

Gmail: How to Keep Track Despite Missing Folders
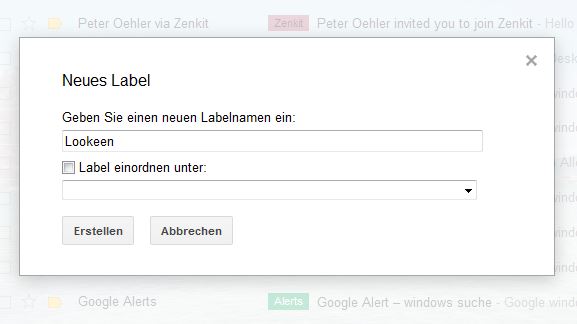
The History of Gmail Everything began in August 2001. Paul Buchheit, who had previously experimented with email programs in his private life, was tasked with developing a web-based email client. The first program he successfully implemented was a search engine for his emails. For this, he used the extremely fast search feature of Google Groups, which he had previously worked on. Soon, his colleagues also wanted to use this search function for their emails. In order to search for emails, emails must also be stored, which requires storage space. Therefore, Google decided to provide users with 1 gigabyte of storage. That was an enormous amount of storage space at the time. For a long time, nothing leaked out about the development of Gmail. By early 2004, Gmail was already being used internally by most Google employees, and they decided to launch it publicly on April 1st. Google is known for its April Fools’ jokes, so many were unsure whether they could take the announcement seriously. On launch day, Google failed to build the necessary infrastructure to actually guarantee 1 GB of storage space for millions of users. As a result, Gmail initially ran on some old computers that no one at Google needed. This was initially sufficient for the beta rollout, for which Google sent out 1,000 invitations to key opinion leaders. As word spread that Google was serious about Gmail, these invitations became highly sought after and were even partially auctioned off on eBay. Thus, necessity became a virtue, and Gmail became a complete success. So, the email client Gmail started with an email search function, which is very Google-like. This still shapes the character of Gmail to this day to the highest degree. In addition to search, Gmail offers a variety of ways to organize your emails and find them more easily. Below, you will learn more about the most important features of Gmail. How to Organize Your Emails in Gmail 1. Assigning Labels First of all, an important point: Labels may look like folders and can sometimes be used as such, but they are not folders! Therefore, you should keep a few things in mind when working with labels. The Inbox (and all categories that look like folders) are actually also labels. Therefore, an email may appear to show up multiple times in different “folders”, but it is not a copy; it is always the same email. So be careful when deleting emails! To create a new label, click on More in the left menu column. Then, under Categories, select the menu item Create new label. Enter a name. You can then choose whether this label should be nested under another existing label. Click Create.
Do you also want to search for emails reliably and efficiently in Outlook? Find out more!
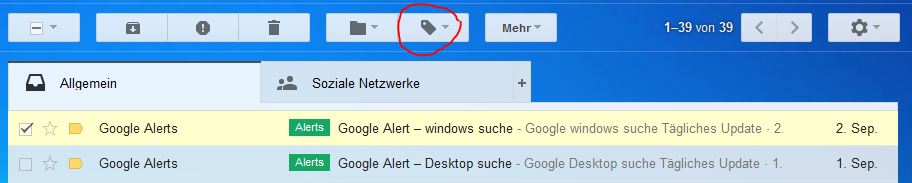
To assign an existing label, drag and drop the email onto the label. Caution: doing so removes the “Inbox” label from this email, and it will only appear under the selected label. You can also select the email and then click on the label icon at the top. In the settings under the Labels menu item, you can then make more precise adjustments, such as showing or hiding a label.
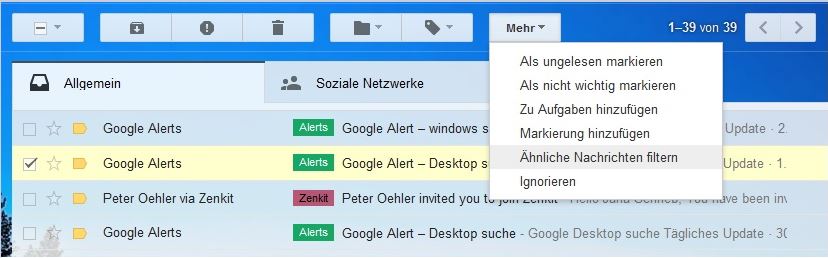
2. Creating Filters and Rules To create filters for a specific type of email, select such an email and then click the More button at the top right. Click on Filter messages like these.
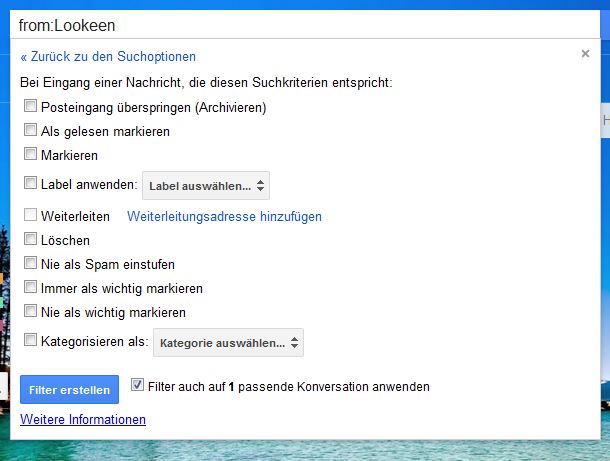
Fill in the fields according to your needs and click on Create filter with these search criteria. There you can, for example, assign labels to the filter or choose where and how the emails should be stored. Check the box next to Apply filter also to matching conversations, if you want the filter to apply to already received, corresponding emails. Click the button Create filter.
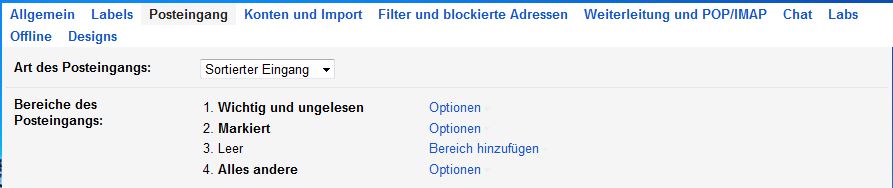
3. Prioritization by Importance and Customizing the Inbox Important emails can be displayed pre-sorted in the inbox. To do this, open the settings via the gear icon in the top right corner. Go to the Inbox tab. There you can select the Type of inbox. Under Inbox sections, it will then show how each would look.

4. Selecting Priority Inbox The so-called Priority Inbox, which can be selected under Type of inbox, attempts to automatically recognize important emails by analyzing the user’s behavior. Gmail remembers emails from certain senders that are frequently read and replied to as important, and then displays similar messages at the very top of the inbox.
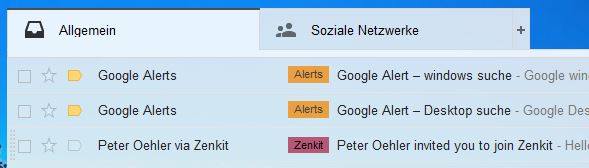
However, the Priority Inbox setting takes a little time to learn. Filters, labels, and flags can speed up this learning process. With just one click, you can mark a message as important by clicking the small tag to the left of the message. It will then turn yellow.
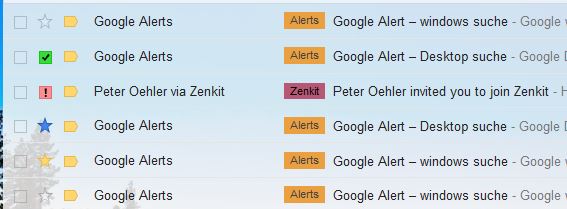
5. Displaying Emails Grouped in Conversations To activate or deactivate this setting, go back to Settings. Under General > Conversation view, you can choose whether conversations should be displayed grouped together or not. 6. Marking Emails with Stars or Symbols Open the settings. In the General tab, scroll down to Stars. There you can choose how many stars or which symbols should be available. Scroll all the way down and save the settings. Mark an email with a star by clicking the star icon to the left of the email in the inbox. Clicking multiple times changes the color or symbol depending on which one you selected in the settings.
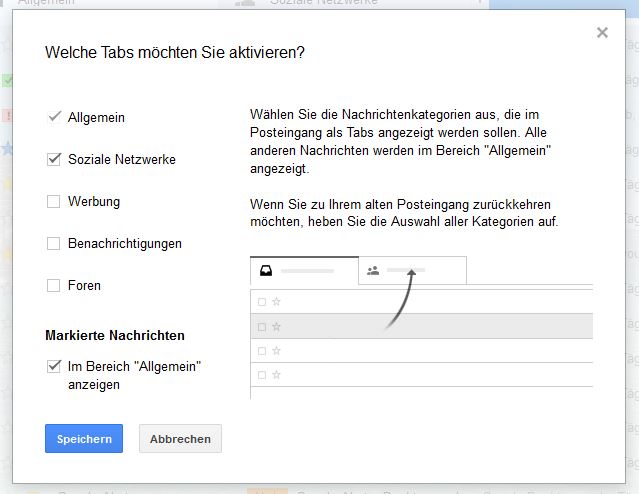
7. Tabs in the Inbox To display tabs in the inbox, you must set Default under Type of inbox in the settings. Under Categories, you can then choose from 5 possible tabs. To activate or deactivate these tabs, click the gear icon and select Configure inbox.
The advantages of labels over folders
-
Multiple labels can be assigned to an email, but it can only be placed in one folder. Therefore, labels are more flexible than folders.
-
An email appears in different places as a result; it looks as if it exists multiple times, but this is not the case. This saves storage space.
-
Working with labels saves you a lot of time and effort for folder structures and sorting emails into the correct folders.
-
If you assign a label to an email in a conversation, you label the entire conversation.
-
Gmail automatically learns which emails should receive which labels.Tips for Handling Labels Make it a habit to assign a label to new emails immediately. This will save you work in the future. Assign emails to the desired label via drag and drop. However, this will remove the “Inbox” label, and the email will only be found under your custom labels. Only apply labels to messages that are truly important and might need to be referenced later, for example to reply to them. Do not create too many different labels and avoid an overly complicated label structure with numerous sub-labels. You can simply hide labels that you do not use frequently. You can move old emails to the archive. This way, you can still access them later if needed. Automatically assign a label to specific senders or subject lines using the filter function. Use colors for your different labels. You will see your labels in the left sidebar. A small arrow appears next to it when you hover over the label. Click on the arrow. At the very top, you can now select a color. With these tips and tricks, you can keep your Gmail inbox very organized and better manage the flood of emails. And if nothing else helps, there is still Gmail’s highly reliable search function. Search in Gmail The fastest way to find an email is to use the search function in Gmail. Here are a few helpful features that make searching for emails in Gmail even faster and more efficient:
-
Autocomplete: Search queries are compared with email content and suggested
-
Use search operators
-
Use shortcuts
-
Search options: to open them, click the small arrow in the search bar (next to the magnifying glass)


Comments