

Outlook: Add and customize a time zone in the calendar – here's how
If you have international contacts, you need to be careful when scheduling appointments: the time zone of your conversation partner may be completely different. You can avoid this problem by adding the appropriate time zone for that person in your Outlook calendar. Find out how this works for all recent Outlook versions in this blog post.
How to work with time zones in the Outlook calendar
Step 1: Start Outlook.
Step 2: Click on File and then on Options. In the left menu, find the Calendar tab. Scroll down to the time zone section.
Step 3: In the label field, you can now enter the name of the contact you want to associate with the time zone. Additionally, select the appropriate time zone. Using the Time Zone Change field, you can set this time zone as the default.
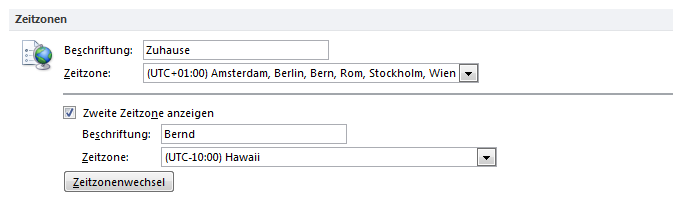
Step 4: Confirm with OK.
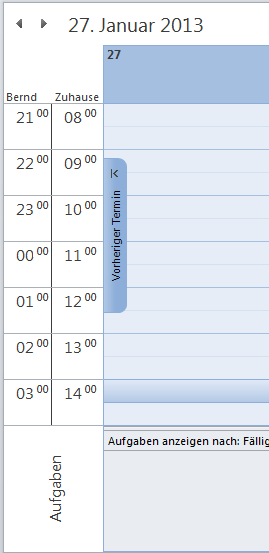
The Outlook calendar will now display both your time zone and that of your conversation partner.
How to change the time zone in the Outlook calendar
Step 1: Start the Outlook calendar.
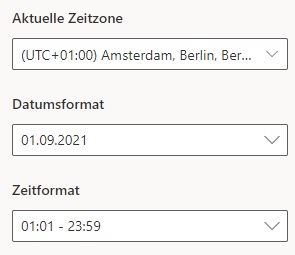
Step 2: Click on the gear icon in the upper right corner.
Step 3: Under the Current time zone option, you can change and adjust your time zone in Outlook and customize it. Confirm with OK afterward.
I hope I could help you adjust your time zone in the Outlook calendar.
See you soon!
Lookeen searches your Outlook in real time, doing so in a matter of seconds!


Comments