

Outlook: Reduce or compress attachments – here's how
You have an important attachment you want to send, but it is too large? No worries, because during the sending process you can easily reduce or compress your attachment in Outlook. Find out how this works for all Outlook versions in this blog post.
How to compress an attachment in Outlook
Step 1: Start Outlook.
Step 2: Compose your new email.
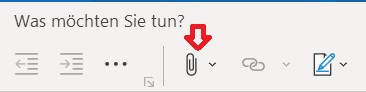
Step 3: Click the attachment icon (Attach File) and click Browse this PC.
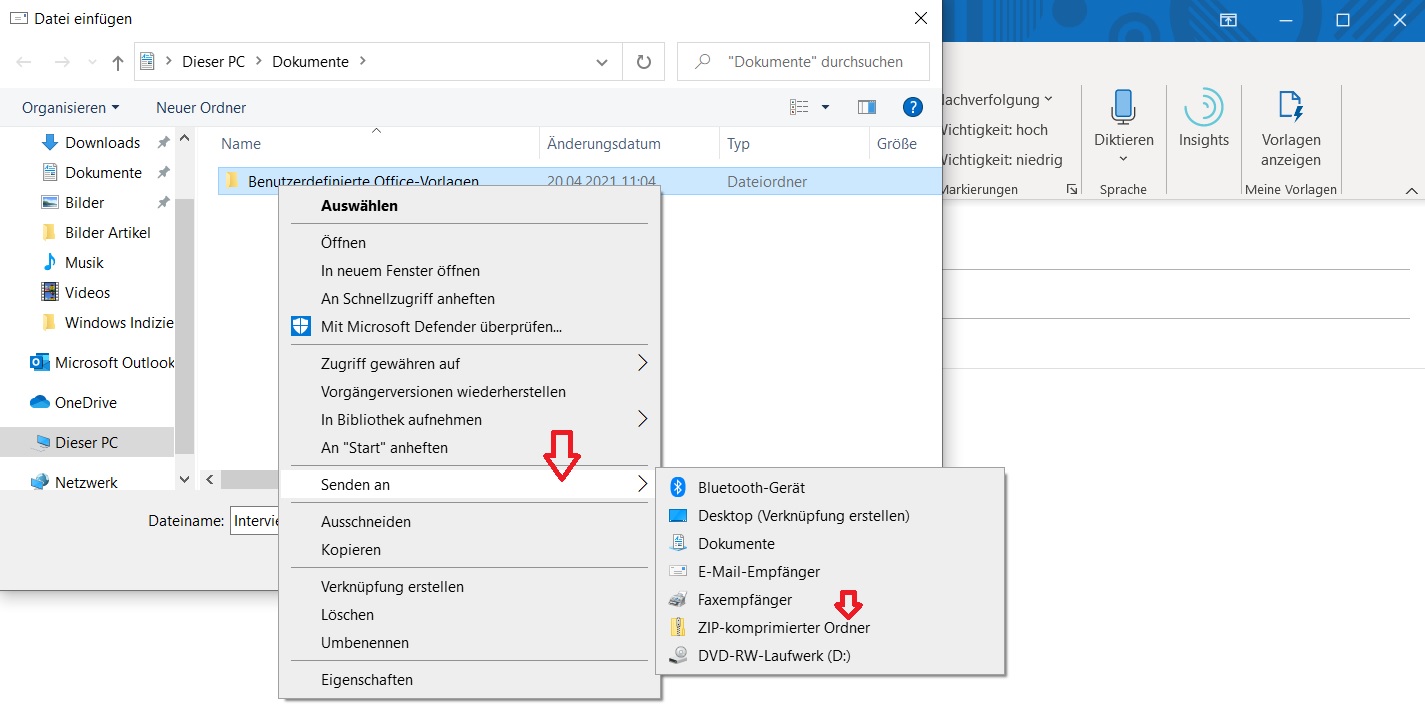
Step 4: Locate the folder you want to attach in Outlook and right-click on it.
Step 5: Click Send to and then select Compressed (zipped) folder.
Step 6: In the same window, Outlook will now automatically create a new compressed folder with the same name for your files. Select it with a double-click. Your attachment in Outlook has now been successfully compressed, and your email should no longer be too large after this step.
Search your Outlook with Lookeen in seconds!
How to reduce the size of an image attachment in Outlook
Step 1: Start Outlook, compose your new email, and add your desired image attachments.
Step 2: Click File and go to the Info tab. If your image attachment is too large for Outlook, you will see the following error message:
“Some recipients might not be able to receive this email because of the image attachments. Adjusting the size of large images can help deliver the message. Images with adjusted sizes are at most 1024 x 768 pixels in size.”
In this case, check the box below for Adjust image size when sending message.
Step 3: Your image attachment will now be automatically adjusted by Outlook. However, this may result in a loss of image quality. If you do not see an error message in the File menu, your image sizes are likely within acceptable limits for Outlook.
I hope this article has helped you compress or reduce the size of your attachments in Outlook.
See you soon!
With the Lookeen search, you are guaranteed to find every email in Outlook again!


Comments