

How to Master the Features of Your Outlook Calendar
Now that you already know how to create an additional calendar in Outlook created, you should familiarize yourself more closely with its features. If you follow our tips, you will soon master the features of your Outlook Calendar and Outlook will become a great relief in organizing your daily life.
Does the Outlook search offer you too few options? Here is the solution!
The Most Important Features of the Outlook Calendar
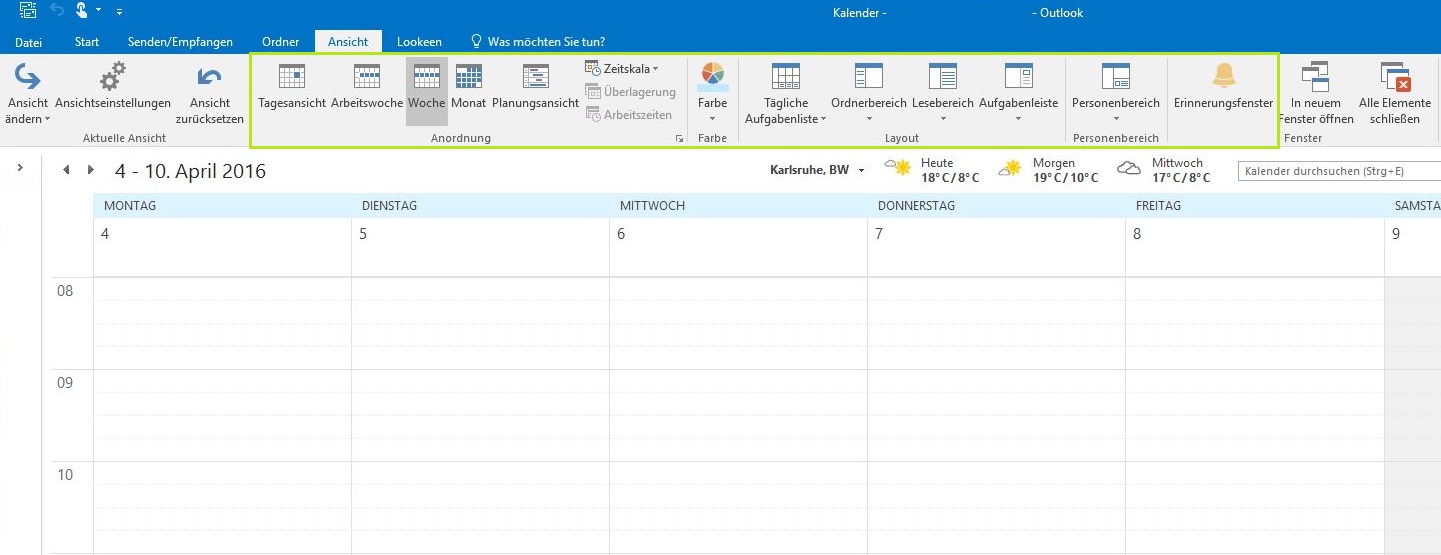
By default, the month view is set in your calendar. In the ribbon, you can choose between a day, work week, week, month, or scheduling view, depending on your needs. You can also switch to the “View” ribbon to select from the full range of different view settings:
In addition to the different views, you can assign different colors to your individual calendars here. You can also set where your “Daily Task List,” your folder, reading, and people pane, as well as the task pane, are displayed. The reminder window shows your current reminders and can be extended if necessary, for example, if they have expired or you cannot keep the appointment. Another feature of the Outlook Calendar is the time scale. This allows you to set in which range your calendar displays appointments.
Creating Appointments in Your Outlook Calendar
An extremely important feature of your Outlook Calendar is creating an appointment. Adding an appointment to your Outlook Calendar is quite simple. Double-click anywhere in your calendar. This is best done on the day you want to schedule the appointment, as that date will be automatically selected. However, it is also no problem, to change the date afterward.
You can navigate to the desired day most easily by using the calendar overview on the left side; clicking a day opens your calendar view exactly on that date. In addition to double-clicking, you can also right-click to open a dropdown menu that offers you the option to create a new appointment in the calendar.
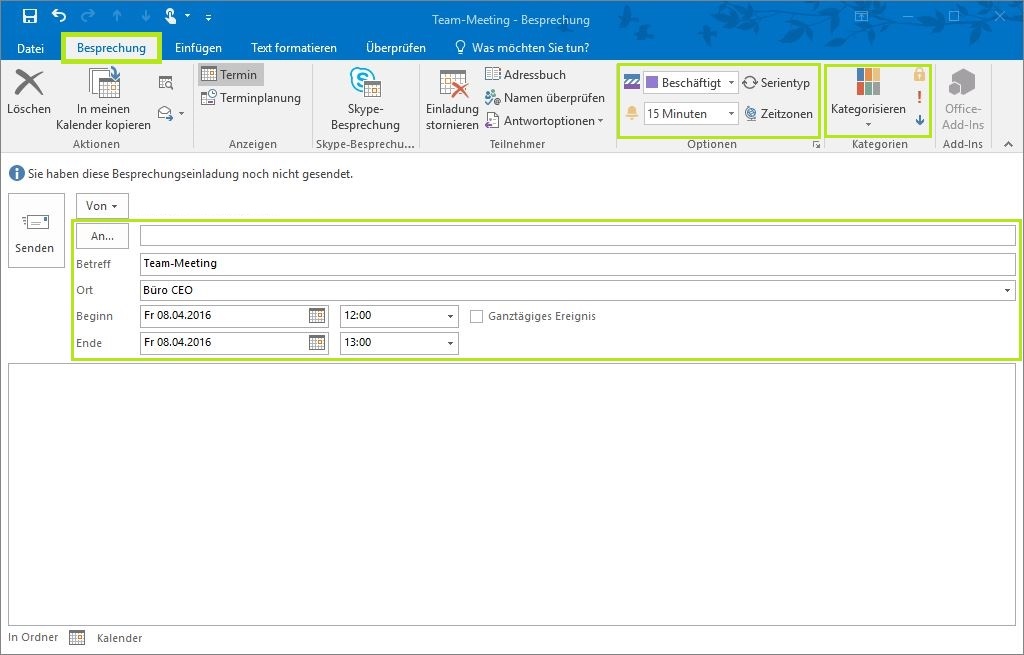
Each new appointment opens a new window that offers you various editing options available. In the subject line, you should enter as precise a title for the appointment as possible. You can optionally select a location where the appointment will take place. Under “Start” and “End,” you can enter the respective start and end dates as well as the start and end times of the appointment. Additionally, you can set the appointment as an “All-day event.”
You also have further settings options, such as inviting participants to appointments via email, receiving a reminder message before the appointment, selecting an individual color code for the appointment, and changing the setting of whether you should be marked as “Busy,” “Away,” “Free,” etc., in a group calendar during that time. How to create a group calendar, we explain to you in this blog post. Since Outlook 2016, it is also possible to organize a Skype meeting as an appointment.
The best way to quickly master the features of your Outlook Calendar is through constant practice. Take your time to try out the program’s options. In this way, you will become an expert in using the Outlook Calendar in no time.



Comments