Color Code with Conditional Formatting: Step-by-Step Instructions
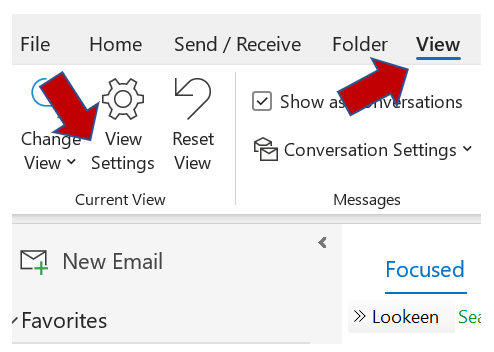
Step 1: Go to the View tab and select “Current View”.
Step 2: Click on “View Settings”.

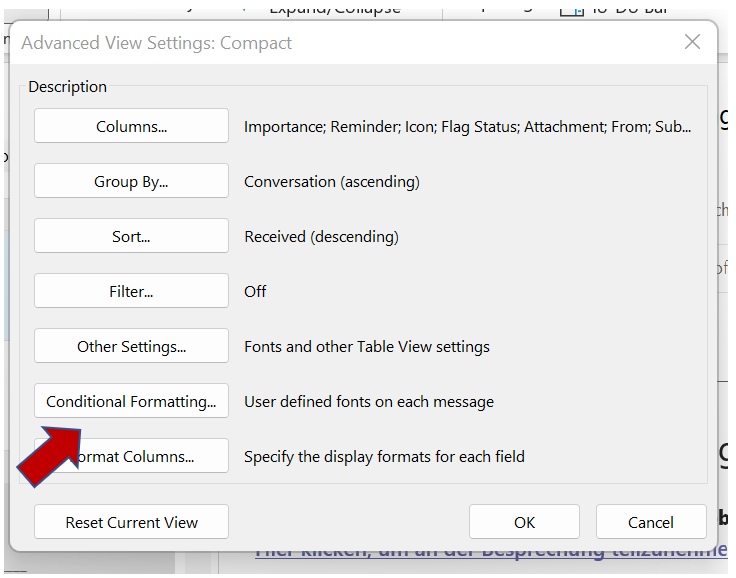
Step 3: Now, select “Conditional Formatting” in the pop-up window.

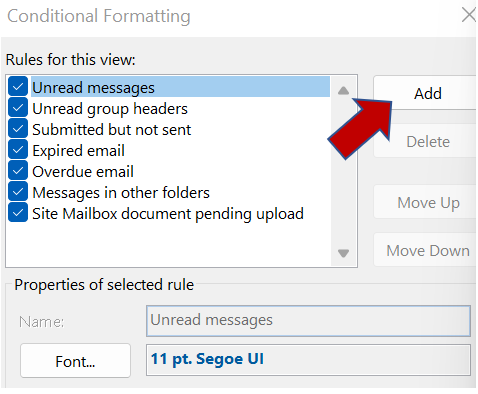
Step 4: Outlook offers you multiple rules for this view. Click on “Untitled” and then press “Add”. to specify the emails you want to be formatted in the field below. Then, you can select the desired font and add more conditions.

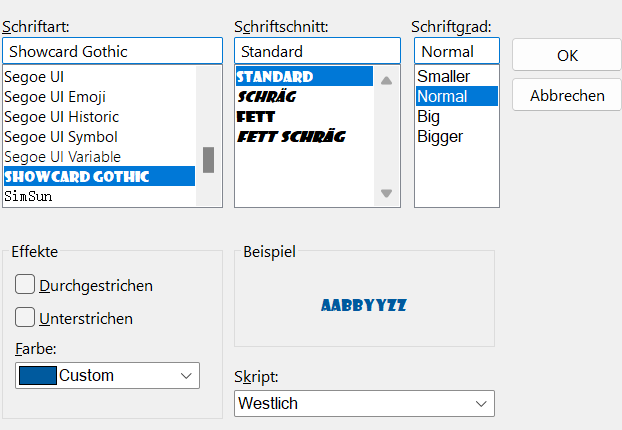
Step 5: In the pop-up window, you can choose the style, color, and size. Pick and then press “Ok”.

Step 6: Finally, click on “Condition”. This allows you to type in the email addresses of one or several senders you want to be highlighted in your inbox. Additionally, you have the option to select formatting of emails with a specific word like “meeting” in the subject line.
Note: If you want all domain names from a specific company to be highlighted, you can also set the rule for all emails with the company’s domain by typing an “@” and then the domain name (@domainename.com).

Apply Conditional Formatting to All Email Folders in Outlook
Step 1: Click “View” and then “Change Views“.
Step 2: Select “Apply Current View to Other Mail Folders“.
Step 3: Now you simply have to choose the folders where you want to apply the same color coding rules as selected before.
Note: You can also select “Apply view to subfolders“ so that the rules are also applyied for any created subfolders.
Do you already use this option and if so for what kind of messages? Let’s start a discussion in the comment section!
See you soon!
Aline & the Lookeen team


Leave a Reply