While indexing speeds up the search process, it may take up a lot of system resources from your computer, so you may contemplate disabling Windows Search for this and maybe other reasons. Continue reading to find out how to disable Windows Search in Windows 8 and 10.
Disabling Windows Search in Windows 8 and Windows 10
First, check if you have Windows Search service running from your Task Manager: Look for Microsoft Windows Search Indexer in the list, then expand using the small arrow to find Windows Search.
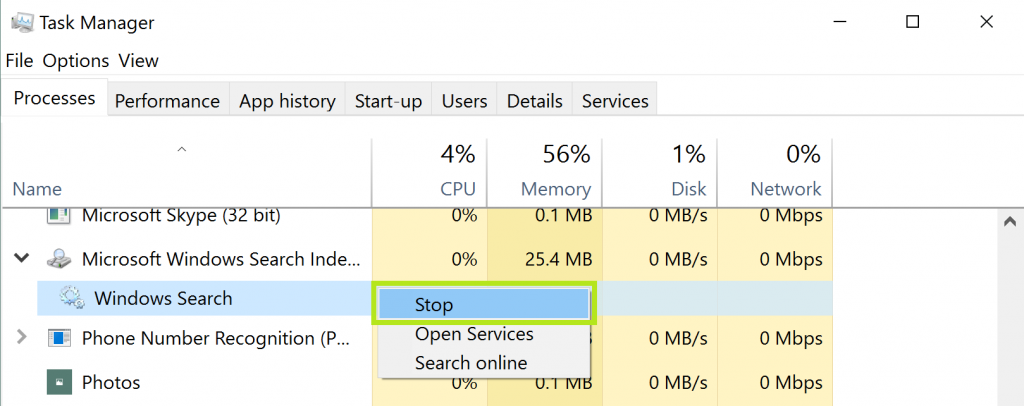
To temporarily stop the service, right-click and select Stop —next time you start up your computer, it will start running once again. This is great if the indexing process is affecting work you’re doing now, but doesn’t generally cause any trouble otherwise.
If you want to disable Windows Search permanently then follow these steps:
- In Windows 8, go to your Start Screen. In Windows 10 just enter the Start Menu.
- Type msc into the search bar.
- Now the services dialog box will open up
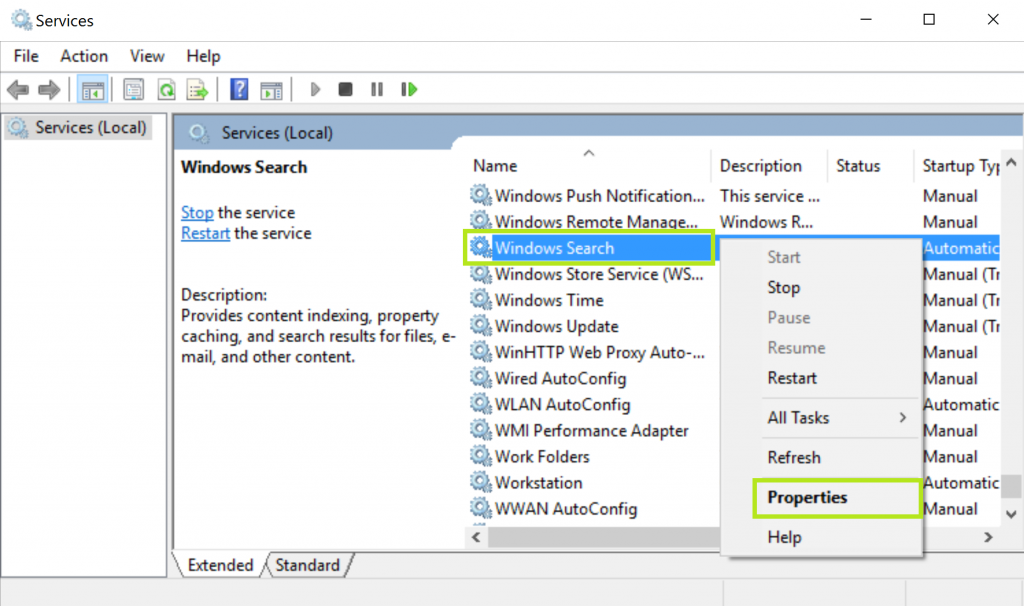
- In the list, look for Windows Search, right-click and choose Properties
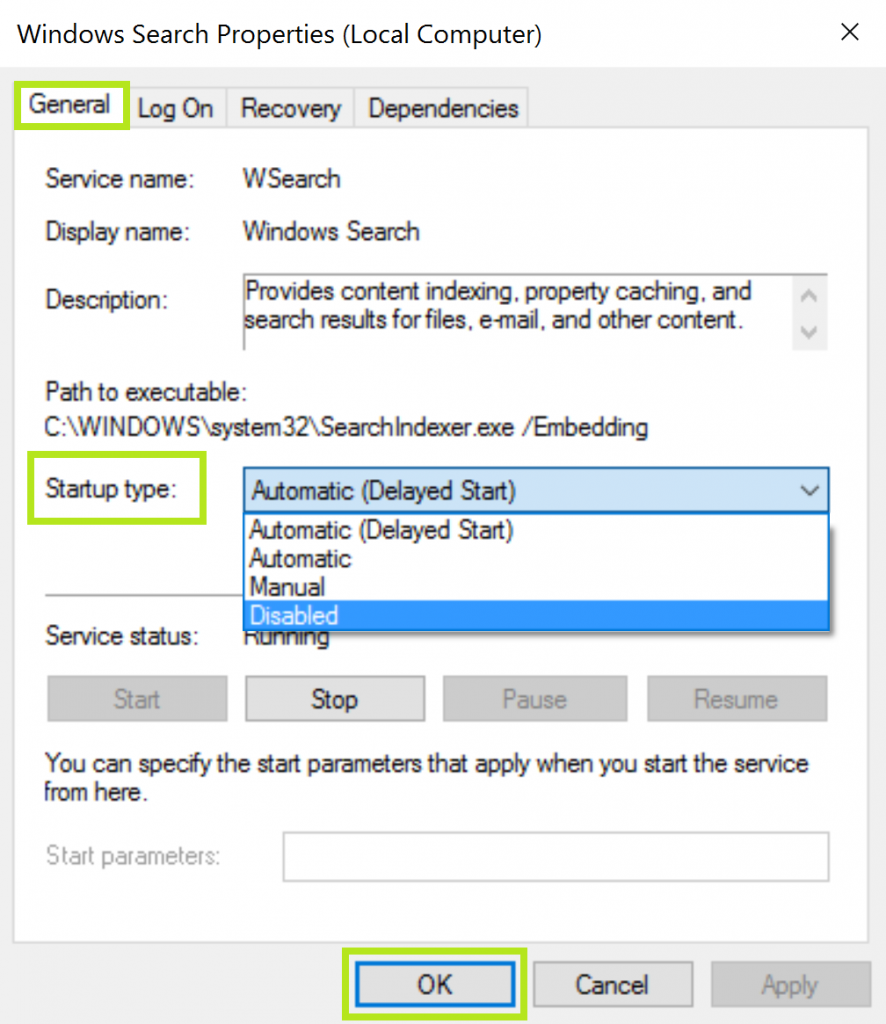
- Under the General tab within the Properties box, look where it says Startup Type
- The Startup Type is always set to automatic, this is where you open the drop down menu and choose Disabled. Click Apply
- Restart your computer.
These steps should disable Windows Search completely, and remove the Windows Search bar from your Start Screen/Start Menu.
Re-Enabling Windows Search
If you want to re-enable the Windows Search Service, obviously searching for services.msc will no longer work. Here are a few ways to return to the Services window without searching for it:
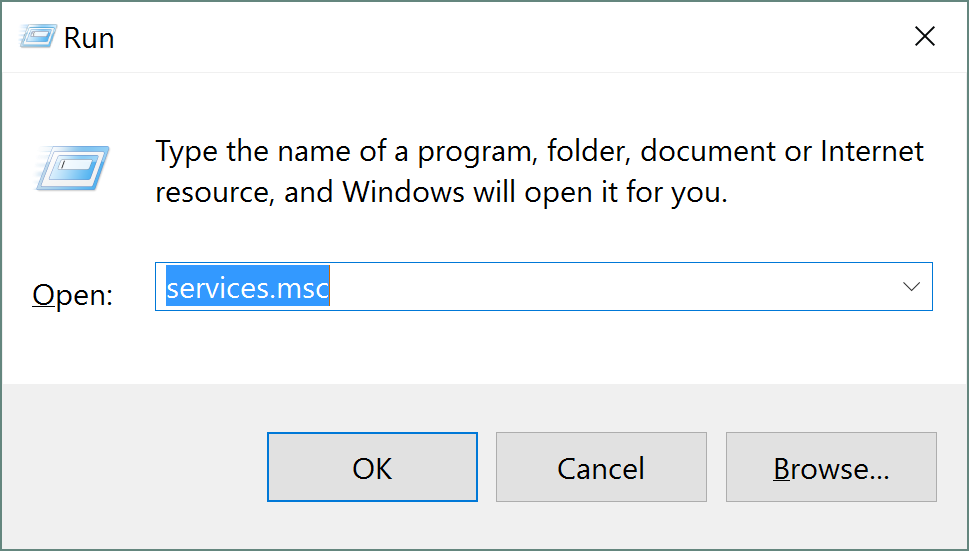
Use the Windows Key + R shortcut to open the Run dialogue, then type services.msc.
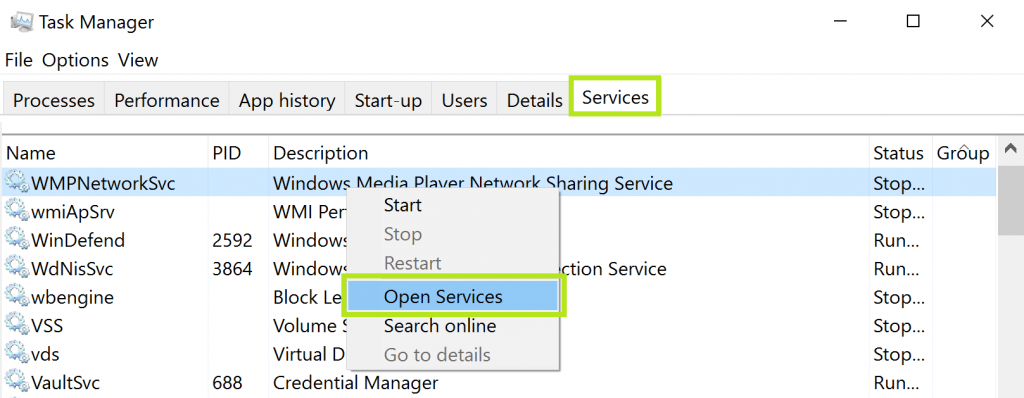
Go to Task Manager (Ctrl+Alt+Del) and navigate to the Services tab. Right click on any service and click Open Services.
From the Services manager, you simply reverse the previous process:
- Find Windows Search in the list
- Right click and select Properties
- In the General tab, next to Startup type: select Automatic or another startup type.
- Click Apply and restart your computer
Disable Windows 7 Search
You can also disable Windows 7 search. The steps may be fairly similar, but it’s best to follow the following instructions if you are using Windows 7, and not 8 or 10, and want windows search disabled. Here’s what you need to do:
1. The first step is to click Start and head right into your Control Panel.
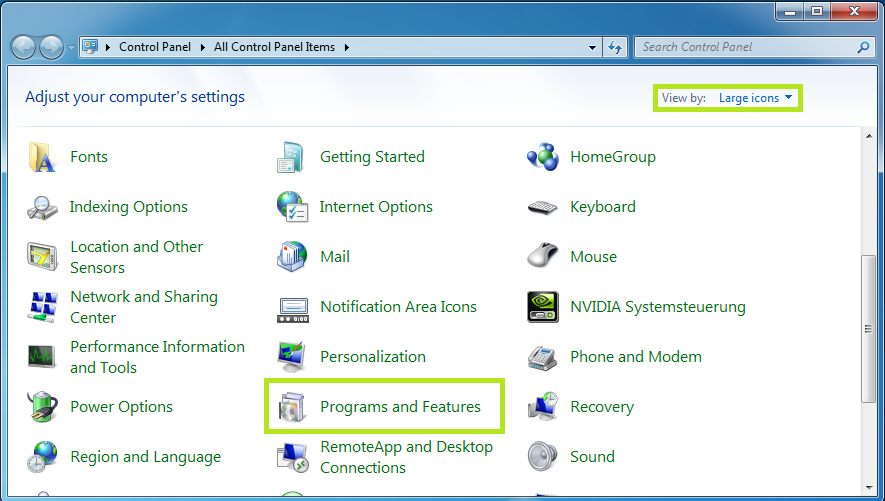
2. It might be easier if you choose to view the icons within Control Panel in Large Icons View, and then click where it says Programs and Features.
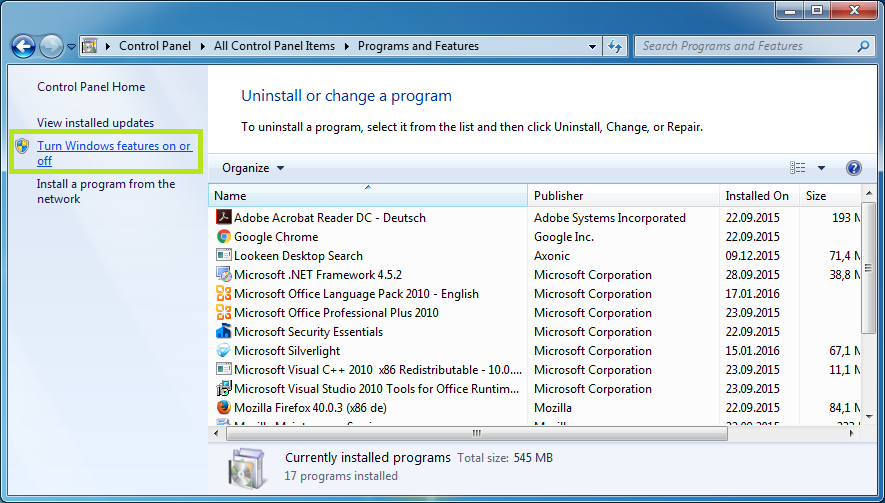
3. Within Programs and Features, click on Turn Windows features on or off which is found on the left hand panel.
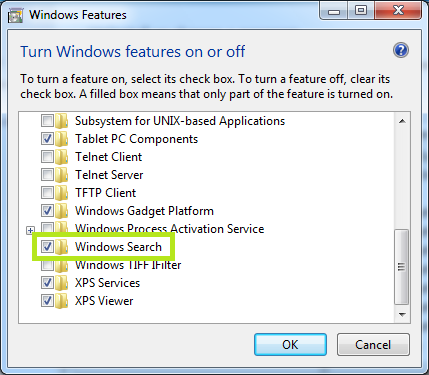
4. Find Windows Search in the list, and uncheck the box next to it.
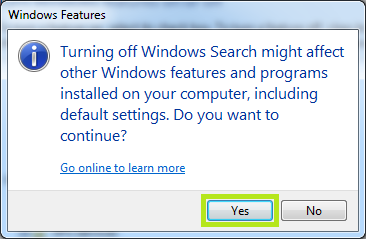
5. A message will pop up that will ask for confirmation that you want to continue. Click Yes.
6. Back in the features window, click OK.
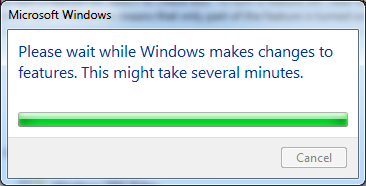
7. Another window will pop up, showing the progress of the changes you just made, then another that will require you to restart your system.
Once you start your computer up again, you will see that the search box is gone from the Start Menu – meaning that you have successfully disabled Windows 7 search.
That’s all there is! As you see, it’s pretty easy to disable Windows Search, and get it up and running again if you decide you want it back.
Updated 25.04.16 to include instructions for Windows 7


Windows Search can not run on Windows 7, 8, 8.1, and 10 by double click error. Currently, it can only run in Windows Vista and in Windows XP. In Windows 10 Redstone 3 Insider Preview Build 16215 was corrected by the indexer and updated by a new one to avoid double-clicking.