How To Change Advanced Indexing Options in Windows
Indexing doesn’t actually do anything to your files—it just creates a virtual index (like at the back of a book) of the content on your computer. This is how your desktop search works, and how it is able to find your files and folders quickly – it just looks up the word in it’s index, then shows you the pages the word is on. Simple as that. It’s a wonderful function, and it’s a function you can customize across all of the Windows versions.
The desktop search improved quite a bit with Windows 7. The default setting for the indexer is that it will index the most common locations where your files are stored for example, all of the Libraries, User Folder content, and email. You can add locations easily, including some network drives and external hard drives.
Here’s what you should do to change the indexing options:
Click Start and in the search box type in Search
From the menu click on Indexing Options
To add a new location, click on the Modify button
Now you can check off any drives or folders that you would like to index
If certain file types aren’t being indexed, then you need to click on the Advanced button in the main Indexing Options screen, then click on the tab that says File Types, and choose the file types you’d like to be indexed.
Indexing Options on Windows 8
The most recent versions of Windows all have similar ways of changing the indexing options, but in Windows 8 there’s an easy way to add folders to be indexed. The fastest way to do this is to add it to a Library. A Library is where you can find a collection of locations, which are then automatically indexed. To add folders to a library follow these steps:
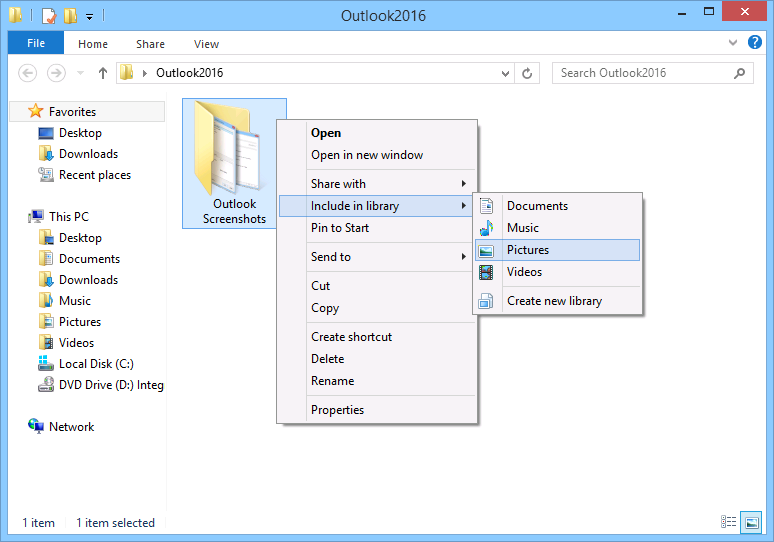
Find the folder(s) you would like to be indexed
You can select more than one folder, then right-click
Click Include Library, and then choose which library to add it to.
Those files will now be indexed and found in your searches.
Indexing Options on Windows 10
Windows 10 search is similar to Windows 8, but you can still optimize all of the locations that are indexed for your desktop searches. To open the indexing Options follow this:
Right click on the Start Menu button to open the Control Panel
Click on Indexing Options
If you click Modify you will now see a list of locations that are indexed. Here is where you can add other locations to your index.
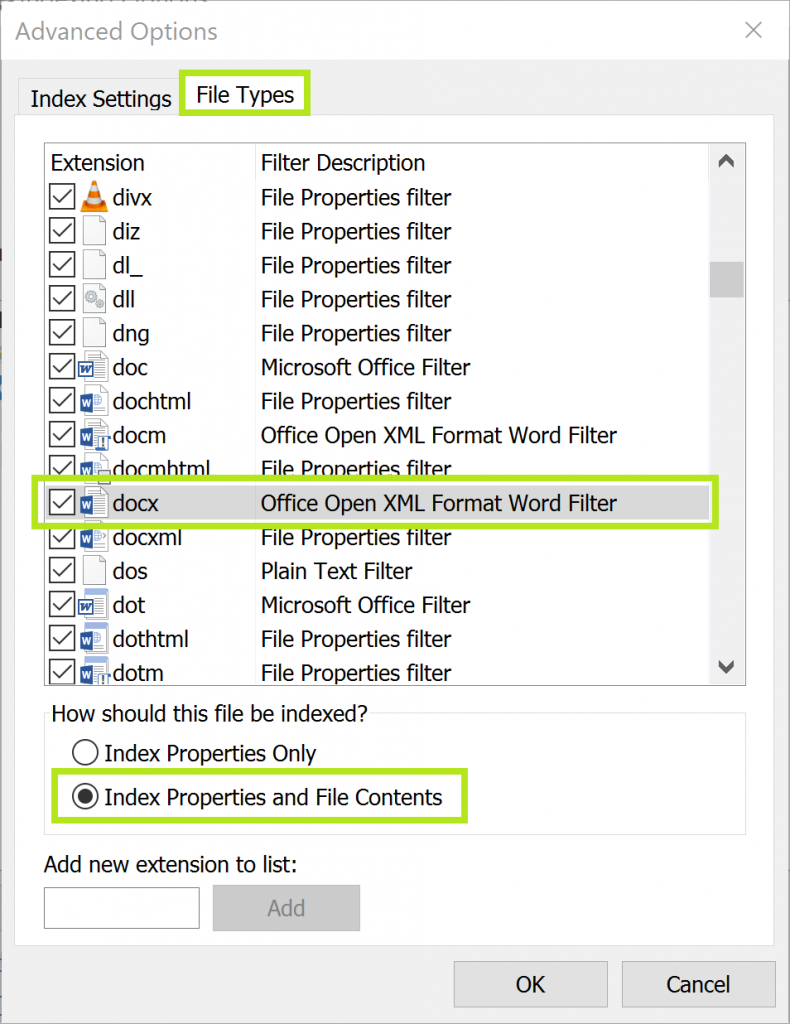
If you click Advanced and navigate to File Types you can change which types of files Windows indexes. You can also tell Windows to index the contents of certain files too – just select Index Properties and File Contents under ‘How should this file be indexed?’ when you have your file type selected.
Understanding which files you’re indexing, and which files you can or should search the contents of (eg .doc or .pdf), can help you understand why your search might not be working.
Windows indexing options are quite customizable, so it’s really a matter of getting familiar with the systems, and choosing the right options for you.


Leave a Reply