How to publish your Outlook Calendar step-by-step
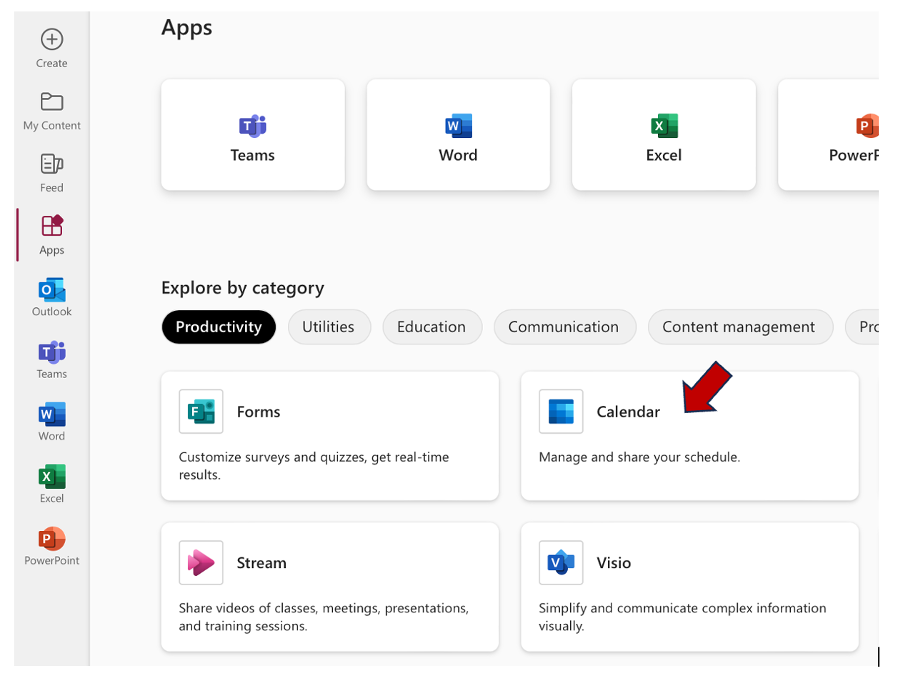
Step 1: Open your Office.com, click “Apps” on the left, and then select your Outlook calendar.

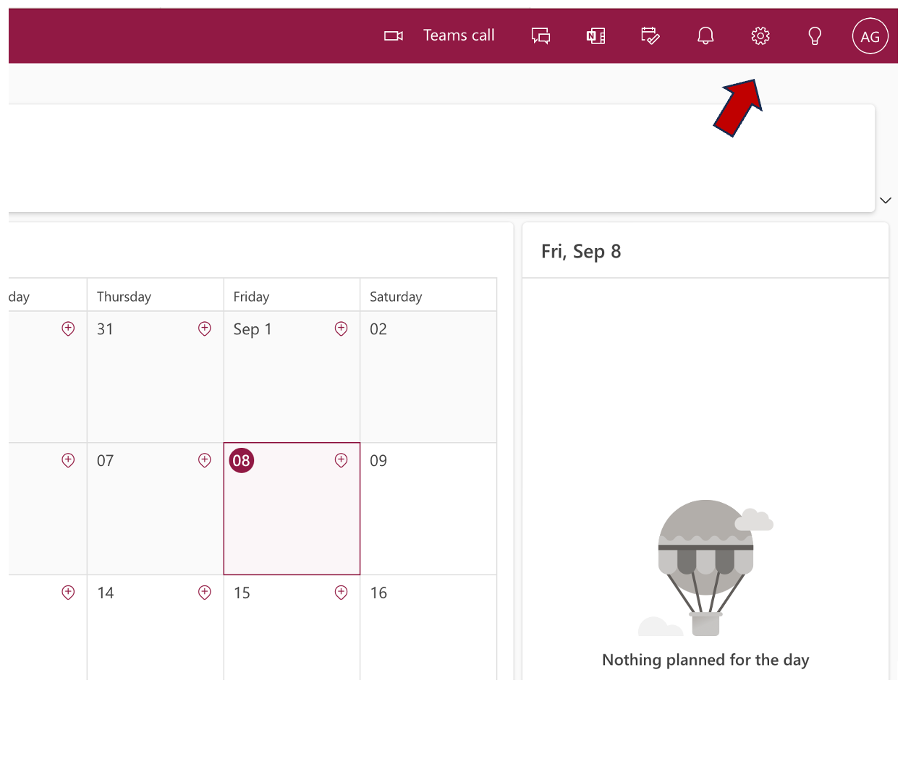
Step 2: In the upper-right corner you’ll find the “Gear Icon”. Select it and scroll down until “View all Outlook Settings”.

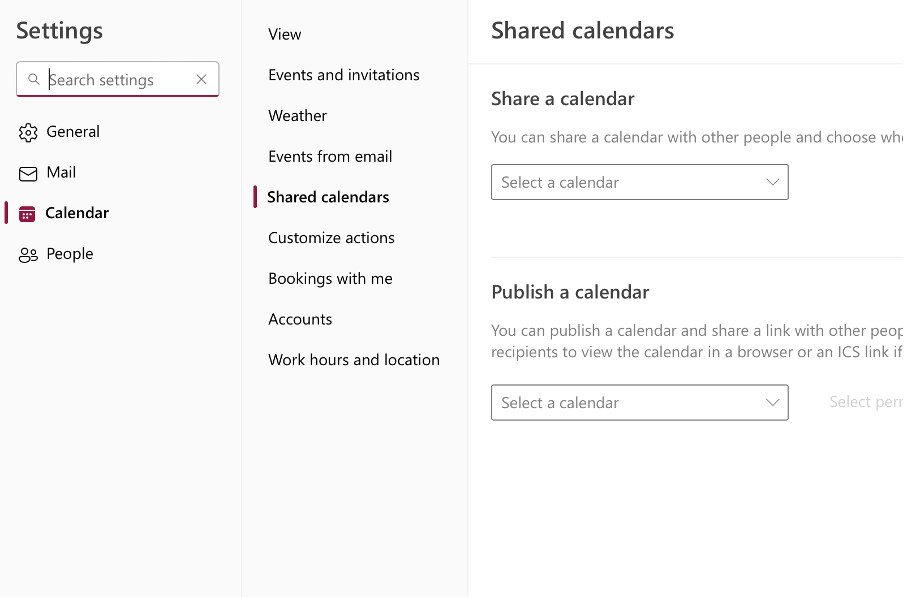
Step 3: In the pop-up window “Settings”, click “Calendar” on the left and then “Shared Calendar”.
Step 4: Now you can select “Publish a Calendar” and select the according one.

Step 5: You can now add permissions as desired and, finally, click “Publish”.
Try desktop search solution Lookeen for free! It will find every contact, document and file.How to Add the Calendar Link to your Email Signature step-by-step
Now that you created a link to your Outlook calendar, you can add it to your signature. This way, others can easily see when you’ll be available and propose an appointment.
Step 1: Open your Outlook and click “File” and then “Options”.
Step 2: Select “Mail” and then “Signature”.
If you’ll need a more detailed description about adding signatures to your Outlook, click here.
Do you have questions? Feel free to leave a comment in the comment section.
See you soon!
Aline & the Lookeen team


Leave a Reply