What can you do to make sure that you don’t end up without any form of contacts list? Let’s take a look.
Create Contacts from Senders and Recipients in Outlook
First thing you need to know before jumping into this is that it works well, but won’t be quick and easy. Outlook, unfortunately, does not have an option to just instantly add all senders and recipients as contacts. This is when the Import and Export Wizard and a little bit of Microsoft Excel wizardry will come into play. This will take some patience, as many things with Outlook do, so get ready to thoroughly follow the steps below.
Part One: Export “From Name” and “From Address” to a CSV-File
Let’s start in the Inbox folder; we will go over the steps for the sent items folder later on. Here’s where to start:
Pick the folder you want to use as a source, here we are starting with the Inbox folder.
You now need to start the import and export wizard.
- – In Outlook 2007 you go to File > Import and Export,
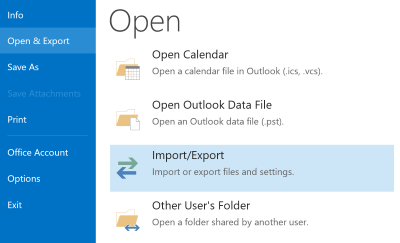
- – In Outlook 2010 you go to File > Open > Import,
- – In Outlook 2013 and 2016 go to File > Open & Export > Import/Export.
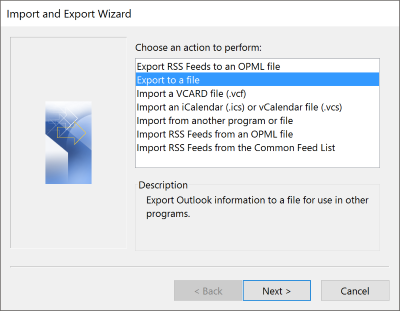
Now choose to ‘Export to a file’.
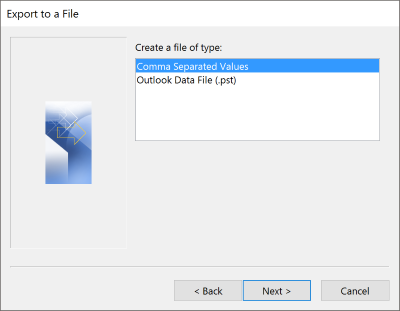
Choose ‘Comma Separated Values’.
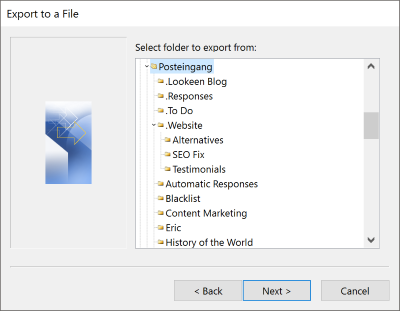
Select your Inbox from the list.
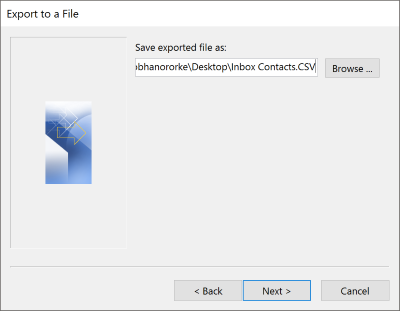
Choose a location and a name for your csv-file.
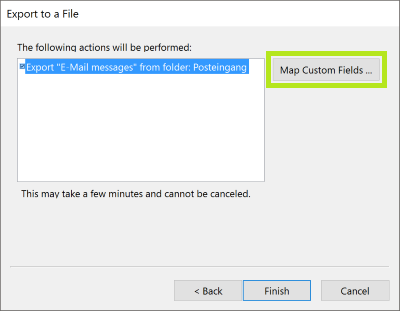
Check the box in front of: ‘Export “Email messages” from folder: Inbox’Click Map Custom Fields
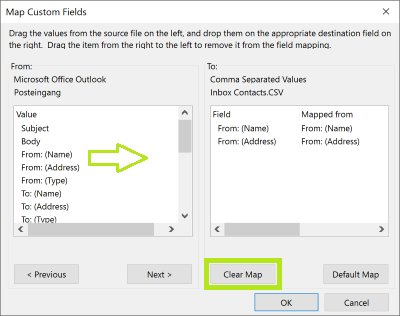
In the dialog box click on Clear Map.
Now you can drag and drop the corresponding fields you need to the ‘To:’ box on the right. Drag over ‘From: (Name)’ and ‘From: (Address)’.
Click OK then Finish to let the export process Begin.
Part Two: Remove the Duplicates
Here’s how to remove duplicate names and addresses:
- Open up the exported CSV file in Microsoft Excel.
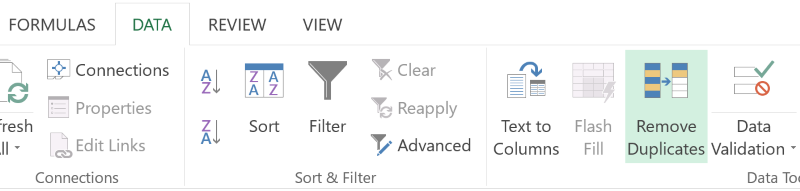
- Now select the entirety of the A and B columns.
- On the Data tab click Remove Duplicates.
- Click OK to remove the duplicates.
- You might want to go through the list afterwards to prune out any spam or auto-generated emails.
- Save and close the document.
Part Three: Import the CSV-File into the Contacts Folder
Now that you have cleaned up the CSV-file, it is time to import those names and address into your Outlook Contacts. Here’s how to do that:
- Get into Outlook and start up the Import and Export Wizard again.
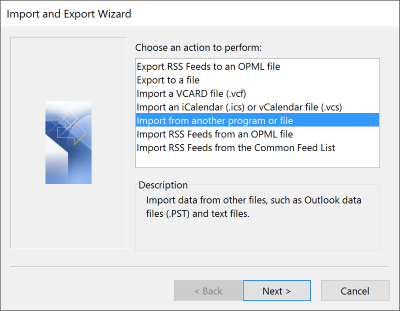
This time choose ‘Import from another program or file’, choose ‘Comma-Separated Values’, and browse to the CSV-file you saved.
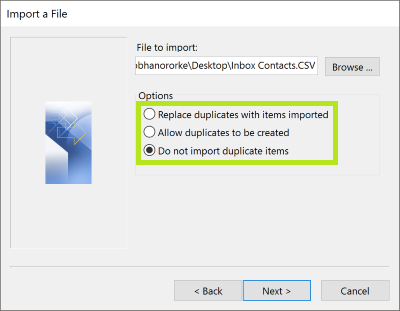
Choose how to handle any duplicates you may have in your Contacts folder and click Next.
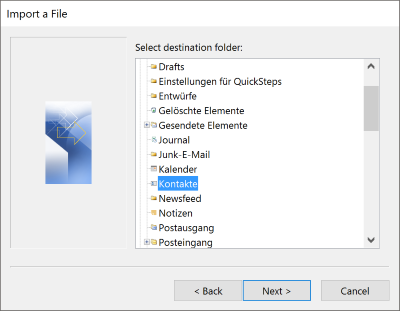
Choose the Contacts folder.
Check the box in front of ‘Import <CSV-file name> into Folder: Contacts’.
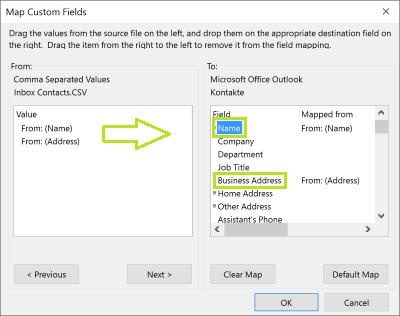
Click Map Custom fields.
In the dialog box, drag and drop the fields on the left to the right: ‘From: (Name)’ > ‘Name’ and ‘From: (Address)’ > ‘E-mail’.
Click OK and the Import process will begin.
Using the Sent Items Folder
The steps to using the Sent Items folder are about the same, except you need to start in the in the Sent Items folder and instead of dragging ‘From: (Name)’ in the steps of Part One, you will instead drag the ‘To: (Name)’ and ‘To: (Address)’. In the CSV-File you will also have to delete or edit the rows containing a semicolon, because this means the row has multiple addresses that cannot be imported as multiple contacts.
There you have it. That’s how to add senders and recipients to your Outlook Contacts. You’ll be a more organized and productive Outlook user, and will never have to worry about your contacts cache being accidentally deleted.


Leave a Reply