By default, conditional formatting will show all of your unread emails in bold. By customizing it, you can highlight emails that are more important to you. Here’s how to set up conditional formatting in Outlook 2013:
Conditional Formatting Outlook 2013
If you would like to start using Conditional Formatting in your Outlook 2013 inbox, then it’s just a matter of getting familiar with the settings the Outlook has to offer. To set up Conditional Formatting:
- Go to the View Tab on the Ribbon
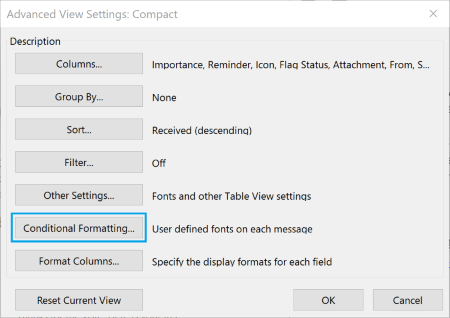
- Then within the Current View group, click on View Settings.
- Then click on Conditional Formatting.
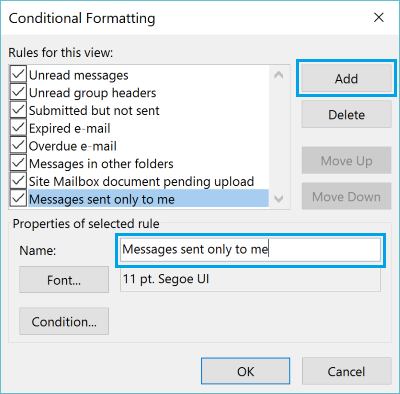
- To create a new rule for Conditional Formatting, click Add.
If you used Outlook 2003 or earlier versions of Outlook, you might have color-coded most of your emails to better organize your inbox. Color coding is called Conditional Formatting in Outlook 2013. Conditional Formatting allows you to completely customize how the emails in your inbox appear.
When creating a condition for your inbox there are some simple guidelines you can follow:
Make sure you name it something that specifically applies to the condition you are creating. This makes it easier to manage all of the conditions you create, and will allow you to easily edit or delete them without wondering which one it is.
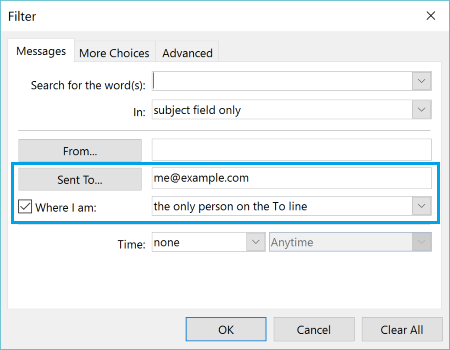
Make sure you click the button that says Condition so you can specify what you want the condition to be. Say, for example, that you want the condition to be that the messages must contain only your name in the ‘To:’ line. From the drop down menu, select the one that says “the only person on the To line.”
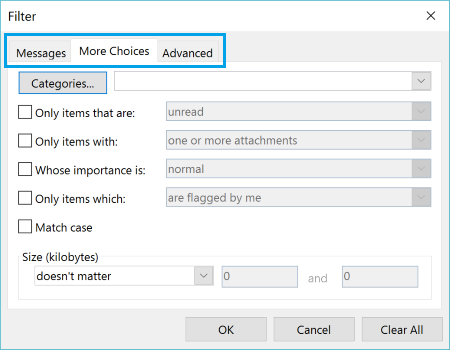
There are many other conditions to choose from. Explore the options given in the drop down menus in the Messages tab, or have a look through the extra conditions in the More Choices tab. Advanced users can even define very specific criteria under the Advanced tab.
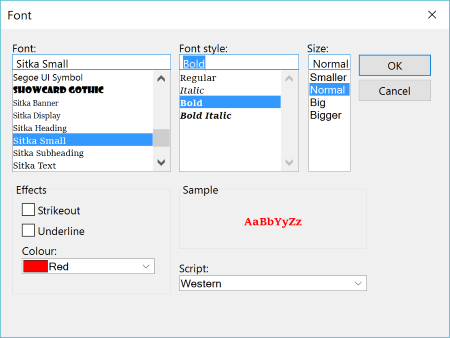
After you click OK, click the Font button next. This is a very important aspect of conditional formatting. Here you can make sure you choose a specific color to go with the condition. For this specific one, select a bold color like Red, so that it will stand out in your Outlook Inbox. You might even want to make it a bit larger and put the font in Bold, so that when you see it, you know the message is only for you, and that it could be important.
With Conditional Formatting in Outlook 2013 you can also make messages that come from your boss or colleagues, or from family and friends, a different color. You are essentially color coding your inbox.
This can greatly improve your email productivity, as you can quickly glance over your inbox and select the emails that need to be read right away. This is a useful tool in Outlook, and one that can be customized to each person’s different needs.


I like this feature, but how can I exclude someone and is there a way to remove the feature if the Out of Office is on.
Hi, it seems that the trick can only apply for a single folder/view. Can we apply to all folders with only 1 conditional formatting setup?
I just found the same issue. I did this to my inbox and I am very happy for this but as soon the emails leave the inbox the color goes away.
Pretty Good Article! This blog has great information that you share on this website. this article gives high-quality information. Thanks a lot for sharing.
Well after posting that is was only available in the inbox, I discovered if you click on change view under the view tab, Click apply current view to other mail folders then check the box – apply to sub-folders. Now all my folders ate color coded!
Thank you so much for this tip