Easier than it seems: Encryption in Outlook
Encryption of your emails in Outlook is not as intimidating as it seems, but we are here to step you through the process and show all the options available to encrypt your emails.
The first step to encrypt emails in Outlook is to register for a Digital I.D. A digital I.D. can also be called an Email Certificate (the email certificate will contain your public key).
Be aware that some of these services through Microsoft are not free, and there is a possible fee involved. If you still want to continue, then follow these steps to get your digital ID in Outlook 2010 or 2013.
- Go to the File tab and click Options
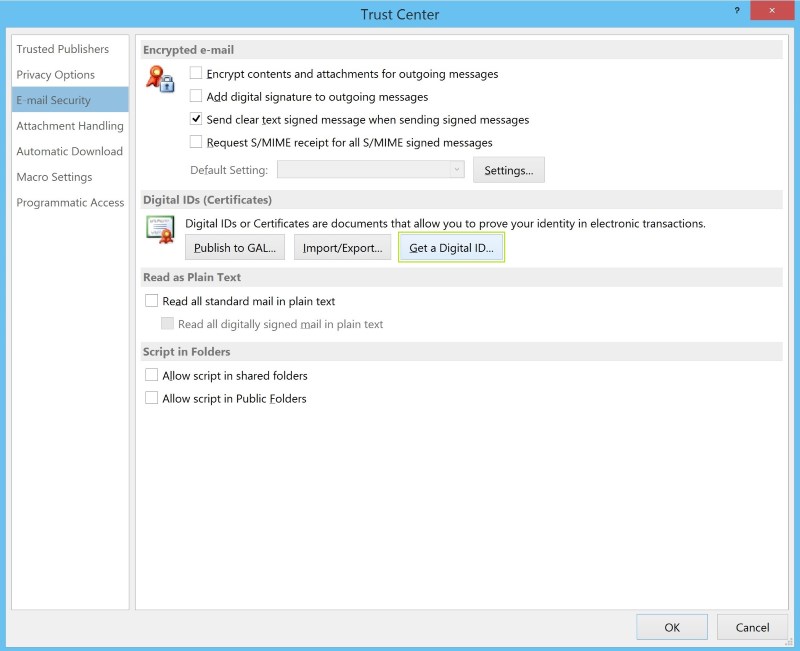
- Choose Trust Center then click Trust Center Settings under Microsoft Outlook Trust Center
- In the E-mail Security tab, under Digital IDs (Certificates), click Get a Digital ID
A webpage will now open on the Microsoft Office Online website. It will list different certification authorities. Choose the one that better suits your needs, and just follow the instructions on the page to register for a digital ID. You will receive an email with further instructions.
With your digital ID (email certificate) you will be able to share your public key (this is a part of your email certificate). Your readable text can now be changed into encrypted text.
Sending and Reading Encrypted Messages in Outlook
Sending and reading encrypted messages requires that both the sender and the recipient share their digital IDs. To share your public key you need to digitally sign your email, which will attach the public key to the email. Then they need to save your email address with the certificate in their address book. When you do the same with their public key you will be able to send and receive encrypted emails.
Encrypt a Single Message
To encrypt a single message before you send it:
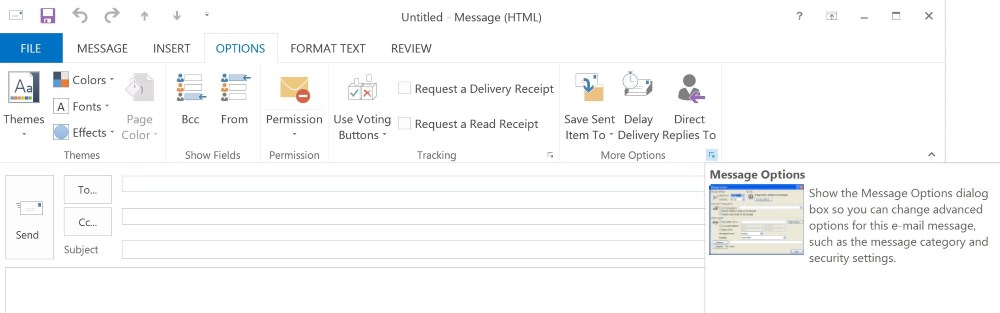
- Go to the Options tab in your new email window
- In the More Options group, click the small arrow icon to bring up the Properties
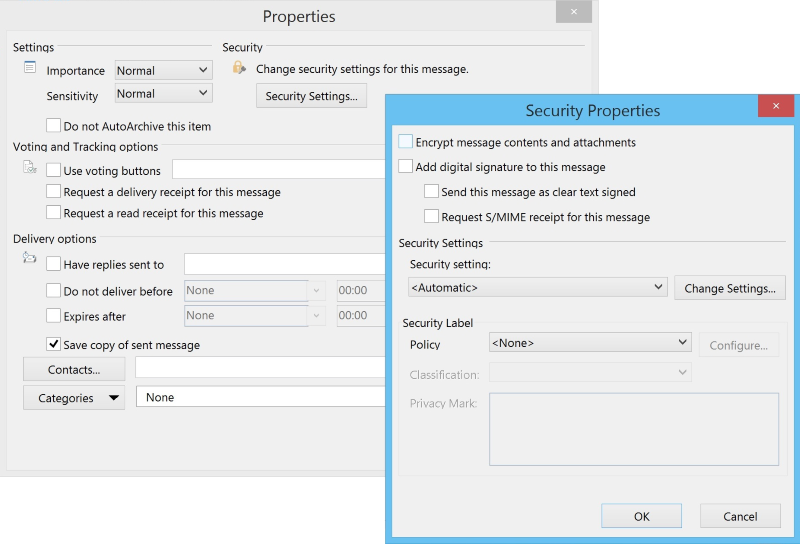
- In the new window click Security Settings
- Now in the Security Properties window select Encrypt message contents and attachments.
All that is left to do is to compose and send your email in Outlook.
Encrypt all Messages
If you want all the emails you send to be encrypted, follow these steps:
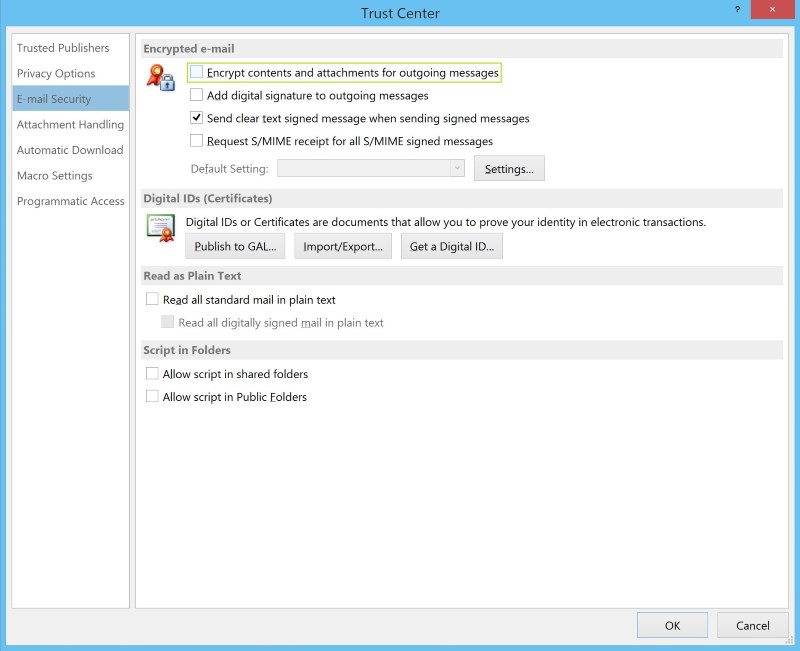
- In Outlook go to the File tab, then choose Options
- In the Trust Center tab click Trust Center Settings
- In the Trust Center window, click E-mail Security, then select the Encrypt contents and attachments for outgoing messages
- Confirm all changes by clicking OK
Now all of your outgoing emails will be encrypted.
If the recipient cannot read encrypted messages, Outlook will notify you, but for the most part your emails are now private.


Leave a Reply